

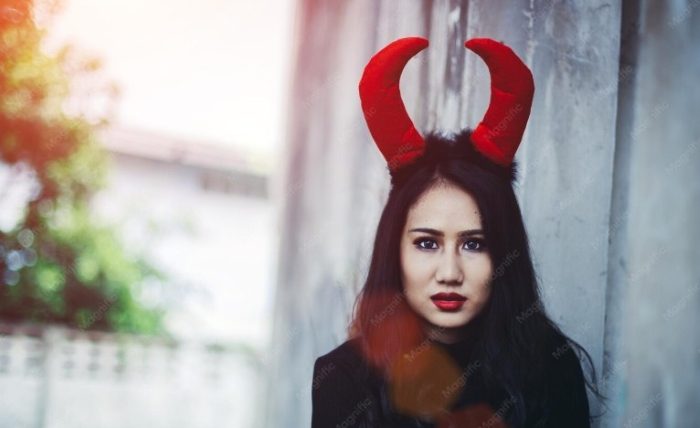
Most Halloween photos fail for the exact same reason and it has nothing to do with the camera. Somebody takes a solid portrait at a party, decides five minutes before posting that it needs a little extra personality and slaps a generic sticker onto their forehead using whatever basic filter app happens to be sitting on their home screen. The result is almost always the same: a flat, bright red triangle hovering awkwardly over their hair like a paper cutout glued to a magazine page.
Physical costume props are rarely any better. Cheap plastic headbands slide backward the moment you laugh. Glossy surfaces catch harsh camera flashes and turn into blown-out white streaks. Thin elastic straps dig into your temples or ruin thirty minutes of hair styling before the night even gets started.
For years, the only genuine alternative was opening heavy desktop editing software, zooming in to four hundred percent, tracing individual strands of hair with a soft brush and manually painting drop shadows across your skin so the composite looked remotely believable. Very few people have forty-five minutes to burn just to update a Discord avatar or post an Instagram Story. Browser-based computer vision has completely changed how fast that job gets done. When you want a clean, realistic way to add devil horns to photo portraits without downloading massive programs or learning complex masking layers, modern web tools handle the alignment and lighting right inside your browser tab.
Why Devil Horn Edits Never Really Go Out of Style
Social media trends usually have the shelf life of milk. A filter blows up on TikTok on Tuesday, floods everyone’s feed by Thursday and feels painfully dated by the following Monday. Devil horns do not follow that cycle. Alongside vampire fangs, glowing neon halos and subtle glitch overlays, they have stuck around for well over a decade as universal visual shorthand for Halloween season, playful sarcasm, rock-and-roll promo shots, and fantasy cosplay previews.
The appeal comes down to immediate visual contrast. You can take a completely ordinary, friendly daylight selfie—someone smiling with a coffee cup or posing casually outdoors—and change the entire mood of the frame simply by altering the upper silhouette of the head. You do not need theatrical face paint, rented studio strobes, or expensive wardrobe pieces to pull off a themed post.
Editing the horns in after the photograph has already been taken also gives you total creative control that physical props can never match:
- Expression comes first: You can focus on getting a natural smile, a sharp side-eye, or a candid laugh without worrying whether a headband is crooked.
- Multiple vibes from a single shot: That same raw portrait can become a subtle, minimalist profile picture with tiny matte black horns, or a dramatic, ridged dark-fantasy poster for a local band gig.
- Zero physical discomfort: No slipping bands, no ruined curls and no distracting plastic shine under indoor LED lights.
- Fast turnaround for seasonal campaigns: Content creators, small shop owners and event organizers regularly need themed graphics on short notice during October and digital placement turns existing brand photos into seasonal promos in seconds.
What Actually Happens Behind the Scenes During an AI Edit
If you remember early smartphone sticker apps from ten years ago, you know why people used to spot fake edits from a mile away. Those apps treated every photograph like a flat piece of cardboard. You dragged an icon onto the screen, pinched two fingers to make it bigger or smaller, rotated it a few degrees and hoped nobody zoomed in. The second a person tilted their chin down or turned their head slightly toward the side of the frame, the illusion collapsed completely.
Modern web-based photo editors rely on several distinct computer-vision steps working together in the background to prevent that pasted-on look.
Mapping Facial Landmarks and Three-Dimensional Head Tilt
Before a single pixel of a horn appears on your screen, the software scans the face to locate dozens of structural anchor points. It reads the corners of the eyes, the arch of the eyebrows, the bridge of the nose, the cheekbones and the curve of the upper forehead. Using the spacing between those coordinates, the system calculates three-dimensional head orientation—specifically pitch (tilting up or down), yaw (turning left or right) and roll (tilting ear toward shoulder).
Suppose you are looking three-quarters toward the left edge of the camera frame. A flat sticker app places two identical triangles side by side, which looks absurd. A perspective-aware engine foreshortens the far horn slightly, narrows its visible width and tucks its base closer to the far temple so both horns follow the true anatomy of your skull.
Separating Foreground Hair Strands from the Forehead
The biggest giveaway in almost any amateur composite is where the bottom of the horn meets the head. Real horns emerge from beneath hair or sit pressed naturally against skin. Older editors simply pasted graphics on top of everything, wiping out messy bangs, curls, or stray hairs underneath.
Current segmentation models distinguish foreground hair texture from the smoother skin of the forehead and the background behind the person. That boundary mask allows the base of each horn to tuck subtly behind loose curls or fringe, creating genuine depth instead of a hard, artificial sticker border.
Reading Room Lighting and Color Cast
Drop a bright, saturated crimson graphic onto a photo shot inside a dimly lit room lit by cool blue monitor glow and your eyes immediately reject it. Lighting estimation models sample surrounding pixel brightness and color temperature across the forehead and upper cheeks. From those values, the renderer determines where the primary light source sits, adds soft contact shadows along the brow line and shifts the horn’s highlights so it shares the exact same atmosphere as the original shot.
| Editing Method | Setup & Hardware Requirements | Handling Angled or Tilted Faces | Hairline & Ambient Shadow Realism | Typical Time per Image |
| Browser-Based AI Photo Tool | Any standard web browser; cloud-rendered | Calculates 3D head tilt and adjusts horn perspective | Automatic edge feathering and ambient shadow matching | 15 to 30 seconds |
| Desktop Layer Editing Software | Paid software install and solid local RAM | Requires manual warp, skew and perspective grids | Depends entirely on manual brush and mask skills | 30 to 60 minutes |
| Basic Mobile Sticker Apps | App store download; often heavy on ads | Flat 2D rotation only; breaks on three-quarter angles | Hard graphic borders with zero shadow integration | 1 to 2 minutes |
A Practical Walkthrough for Clean, Believable Results
Even when an algorithm handles the heavy lifting, the quality of your final export still depends heavily on the source photo you feed into it and a few quick adjustments before you hit download.
- Start with a clear, reasonably well-lit portrait. Shots captured in steady window light or soft outdoor shade give landmark detectors crisp facial edges to read. Heavy motion blur, extreme wide-angle lens distortion, or thick winter beanies covering the entire crown force the model to guess where your hairline sits.
- Upload your file into the browser workspace. Drop your JPG, PNG, or WebP image directly onto the online canvas. Because the heavy neural processing happens on remote servers rather than your local graphics card, an older laptop or mid-range smartphone processes high-resolution portraits just as smoothly as an expensive desktop rig.
- Pick a horn design that matches the mood of your shot. Subtle, matte charcoal or deep burgundy mini-horns look surprisingly natural on everyday selfies. Larger curved ram horns, weathered bone textures, or glowing neon outlines belong on Halloween party flyers, gaming avatars and dramatic cosplay edits.
- Spend ten seconds fine-tuning scale and spacing. Automated placement usually gets you ninety percent of the way there right out of the gate. Still, every face has slightly different proportions. Lowering the base slightly closer to the outer brow, narrowing the gap between the two bases, or tilting the tips slightly inward often transforms a decent edit into one that looks genuinely intentional.
- Check the hairline at full zoom before exporting. Zoom in to one hundred percent along the forehead before saving your file. Make sure there are no faint white halos or mismatched grain patterns. Download the finished image at full native resolution so social platform compression does not turn fine edges blocky.
Matching Horn Styles to Different Creative Projects
One single horn preset rarely works across every kind of photograph. Applying the exact same bright cartoon graphic to both a cozy couple portrait and a dark metal band promo shot usually creates awkward visual tension. Matching scale, surface texture and brightness to your underlying photo keeps everything cohesive.
| Project or Photo Category | Recommended Horn Style | Lighting & Color Adjustments | Best Places to Share or Publish |
| Casual Selfies & Daily Stories | Small, smooth matte-red or charcoal mini-horns | Keep saturation slightly muted so colors blend with skin tones | Instagram Stories, Snapchat, close-friends posts |
| Halloween Party Invites & Flyers | Medium curved horns with warm edge highlights | Push contrast slightly and pair with deep orange or crimson text | Digital party invites, club posters, event banners |
| Cosplay & Dark Fantasy Portraits | Ridged, bone-textured, or dark obsidian horns | Add cool rim lighting or moody side shadows for depth | TikTok transition videos, portfolios, convention teasers |
| Gaming, Music & Creator Avatars | Sharp neon, metallic chrome, or minimalist silhouettes | Match horn hue directly to existing RGB desk lighting | Discord avatars, Twitch panels, Spotify canvas visuals |
| Couples, Friends & Pet Portraits | Lightweight, symmetrical cartoon or soft-shaded horns | Keep horn scale proportional across every subject in frame | Seasonal greeting cards, playful photo carousels |
Seven Common Mistakes That Ruin Otherwise Great Edits
Most unnatural-looking composites fail because of small, easily preventable choices rather than software limitations. Keep an eye out for these frequent pitfalls:
- Placing dark horns against dark backgrounds. If you are standing in front of black velvet curtains, night trees, or a shadow-drenched hallway, dark brown or obsidian horns vanish into the background. Pick a style with subtle rim highlights, metallic sheen, or warmer crimson tones so the silhouette stays legible.
- Cropping too tightly above the forehead. Close-up headshots leave almost nowhere for horns to sit. When the tips press right against the top border of the image, the whole composition feels claustrophobic. Leave generous headroom above your hair before applying the edit.
- Forgetting circular profile crops. Social platforms like Instagram, TikTok, Discord and X display avatars inside circles even though you upload a square file. A horn tip sitting comfortably in the upper corner of a 1:1 square will get sliced clean off once the circular mask wraps around your face.
- Ignoring background subjects in group photos. Multi-person party shots trick basic overlays because people stand at varying distances from the lens. Check each face individually and scale down horns for friends standing a step behind the main subject.
- Stacking heavy filters after placing the horns. Slapping an intense vintage grain preset or aggressive contrast filter onto an image after adding graphics often creates harsh color banding around the hairline. Apply your global color grade at the very end so the original skin texture and added horns share identical grain.
- Overlooking harsh directional flash. Direct smartphone flash flattens facial depth and creates bright specular highlights on the nose and forehead. If your source photo uses harsh flash, choose a horn texture with subtle surface gloss rather than completely flat matte shading.
- Exporting low-resolution previews. Taking a screenshot of your browser window instead of using the proper export button throws away sharpness and introduces blurry compression artifacts around fine edges. Always download the full-resolution output file.
Beyond Halloween: Creative Ways Creators Use Horn Edits Year-Round
While search interest naturally spikes every autumn, digital artists, musicians and everyday social users rely on subtle horn edits throughout the entire calendar year:
- Independent music and podcast cover art: Solo artists and rock or electronic producers frequently use subtle, moody horn silhouettes on single covers to signal an edgy or rebellious track theme without hiring a 3D illustrator.
- Tabletop RPG and gaming character sheets: Players building tiefling or fantasy characters for Dungeons & Dragons campaigns often start with a real portrait or cosplay selfie and add custom horns to create quick character tokens.
- Playful reaction memes for group chats: Turning an overly serious friend’s candid photo into a lighthearted “little devil” reaction sticker remains an easy, harmless inside joke for private group threads.
- Themed promotional graphics for small businesses: Coffee shops launching spicy autumn drinks, gyms running October fitness challenges and local venues hosting costume nights regularly add subtle horns to staff portraits for eye-catching social announcements.
Why Browser Editors Have Replaced Heavy Software for Everyday Visuals
Years ago, anyone who wanted clean photo composites had to maintain local folders packed with transparent PNG assets, learn keyboard shortcuts for layer masks and dedicate substantial hard-drive space to desktop creative suites. That traditional workflow still makes total sense for commercial magazine retouching or print billboards, yet it is complete overkill for seasonal social posts, party invites, or quick visual jokes.
Running edits directly inside a web browser removes installation friction, works across Windows, Mac, Chromebook and mobile devices seamlessly and lets you move from raw camera roll photo to finished graphic in under a minute. When picking an online editor, prioritize tools that preserve original image resolution, support standard file formats without forcing mandatory paywalls for basic previews and export clean images free of distracting watermarks stamped across your face.
Bringing Your Edit Together
Adding devil horns to a portrait is a small visual detail, yet it shows just how practical browser-based computer vision has become. You no longer need manual masking brushes or hours of retouching practice to get clean hairline blending and accurate perspective on an angled head. Start with clear, steady lighting, leave plenty of breathing room above your hairline, match the horn texture to the mood of your shot and you will end up with a sharp, believable edit ready for any feed.